Saturday, August 18, 2018

DATABASE BACKUP AND RESTORE IN DOCKER


Backup and restore of  SQL Database in a Docker container


Prerequisites

  • Docker Engine 1.8+ on any supported Linux distribution or Docker for Mac/Windows. 
  • Minimum of 2 GB of disk space
  • Minimum of 2 GB of RAM


STEPS

1) Pull the SQL Server 2017 Linux container image from Docker Hub

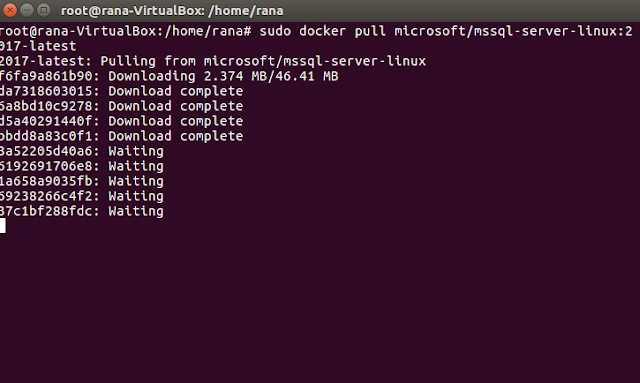
sudo docker pull microsoft/mssql-server-linux:2017-latest


2) To run the container image with Docker, you can use the following command:


sudo docker run -e 'ACCEPT_EULA=Y' -e 'MSSQL_SA_PASSWORD=<YourStrong!Passw0rd>' \

   --name 'sql1' -p 1401:1433 \

   -v sql1data:/var/opt/mssql \
   -d microsoft/mssql-server-linux:2017-latest

3) To view your Docker containers
   
    sudo docker ps -a


If the STATUS column shows a status of Up, then SQL Server is running in the container and listening on the port specified in the PORTS column.

4) Change SA password


   sudo docker exec -it sql1 /opt/mssql-tools/bin/sqlcmd \
   -S localhost -U SA -P '<YourStrong!Passw0rd>' \
   -Q 'ALTER LOGIN SA WITH PASSWORD="<YourNewStrong!Passw0rd>"'


5)  Copy a Backup file into container 

     5.1) Backup folder create 

   sudo docker exec -it sql1 mkdir /var/opt/mssql/backup


   5.2) Next, download the WideWorldImporters-Full.bak file to your host machine


    cd ~
curl -L -o wwi.bak 'https://github.com/Microsoft/sql-server-samples/releases/download/wide-world-importers-v1.0/WideWorldImporters-Full.bak'


  5.3) Use docker cp to copy the backup file into the container in the /var/opt/mssql/backup directory.

sudo docker cp wwi.bak sql1:/var/opt/mssql/backup


  6) Restore Database 


6.1) Run sqlcmd inside the container to list out logical file names and paths inside the backup. This is done with the RESTORE FILELISTONLY Transact-SQL statement.


sudo docker exec -it sql1 /opt/mssql-tools/bin/sqlcmd -S localhost \

   -U SA -P '<YourNewStrong!Passw0rd>' \

   -Q 'RESTORE FILELISTONLY FROM DISK = "/var/opt/mssql/backup/wwi.bak"' \
   | tr -s ' ' | cut -d ' ' -f 1-2


6.2) Call the RESTORE DATABASE command to restore the database inside the container. Specify new paths for each of the files in the previous step.


sudo docker exec -it sql1 /opt/mssql-tools/bin/sqlcmd \

   -S localhost -U SA -P '<YourNewStrong!Passw0rd>' \

   -Q 'RESTORE DATABASE WideWorldImporters FROM DISK = "/var/opt/mssql/backup/wwi.bak" WITH MOVE "WWI_Primary" TO "/var/opt/mssql/data/WideWorldImporters.mdf", MOVE "WWI_UserData" TO "/var/opt/mssql/data/WideWorldImporters_userdata.ndf", MOVE "WWI_Log" TO "/var/opt/mssql/data/WideWorldImporters.ldf", MOVE "WWI_InMemory_Data_1" TO "/var/opt/mssql/data/WideWorldImporters_InMemory_Data_1"'


6.3) Verify the database 


sudo docker exec -it sql1 /opt/mssql-tools/bin/sqlcmd \

   -S localhost -U SA -P '<YourNewStrong!Passw0rd>' \

   -Q 'SELECT Name FROM sys.Databases'


    7)   Make a change in database 

     7.1) Run a query to view the top 10 items in database

     sudo docker exec -it sql1 /opt/mssql-tools/bin/sqlcmd \

   -S localhost -U SA -P '<YourNewStrong!Passw0rd>' \
   -Q 'SELECT TOP 10 StockItemID, StockItemName FROM WideWorldImporters.Warehouse.StockItems ORDER BY StockItemID'


  7.2)   Run a query to update 

   sudo docker exec -it sql1 /opt/mssql-tools/bin/sqlcmd \
   -S localhost -U SA -P '<YourNewStrong!Passw0rd>' \
   -Q 'UPDATE WideWorldImporters.Warehouse.StockItems SET StockItemName="USB missile launcher (Dark Green)" WHERE StockItemID=1; SELECT StockItemID, StockItemName FROM WideWorldImporters.Warehouse.StockItems WHERE StockItemID=1'


8)     Create a new backup

8.1) We have  restored  database into a container, you might also want to regularly create database backups inside the running container. The steps follow a similar pattern to the previous steps but in reverse.


sudo docker exec -it sql1 /opt/mssql-tools/bin/sqlcmd \

   -S localhost -U SA -P '<YourNewStrong!Passw0rd>' \

   -Q "BACKUP DATABASE [WideWorldImporters] TO DISK = N'/var/opt/mssql/backup/wwi_2.bak' WITH NOFORMAT, NOINIT, NAME = 'WideWorldImporters-full', SKIP, NOREWIND, NOUNLOAD, STATS = 10"

8.2) Next, copy the backup file out of the container and onto your host machine. 


cd ~

sudo docker cp sql1:/var/opt/mssql/backup/wwi_2.bak wwi_2.bak

ls -l 


9)    Use the persisted data

in addition to taking database backups for protecting your data, you can also use data volume containers. The sql1data data volume container persists the /var/opt/mssql data even after the container is removed. The following steps completely remove the sql1 container and then create a new container, sql2, with the persisted data.

9.1)  Stop and remove SQL1 container 

        sudo docker stop sql1 
        sudo docker rm sql1


9.2) Create a new container, sql2, and reuse the sql1data data volume container.


sudo docker run -e 'ACCEPT_EULA=Y' -e 'MSSQL_SA_PASSWORD=<YourStrong!Passw0rd>' \

   --name 'sql2' -e 'MSSQL_PID=Developer' -p 1401:1433 \

   -v sql1data:/var/opt/mssql -d microsoft/mssql-server-linux:2017-latest


9.3) The Wide World Importers database is now in the new container. Run a query to verify the previous change you made.


sudo docker exec -it sql2 /opt/mssql-tools/bin/sqlcmd \

   -S localhost -U SA -P '<YourNewStrong!Passw0rd>' \

   -Q 'SELECT StockItemID, StockItemName FROM WideWorldImporters.Warehouse.StockItems WHERE StockItemID=1'


Sunday, July 29, 2018

Installation steps of SQL Server 2017 container image with Docker


           INSTALLATION OF  SQL SERVER DOCKER CONTAINER IMAGES


Docker: 

Docker is an open-source container platform provider written in GO programming language. It’s available for Linux, Windows, and MacOS. In addition, it also works in Azure and AWS environments. Containers allow developers to package up an application with all the parts it needs, such as libraries and other dependencies, and deliver it all out as one package. It’s something similar to Virtual Machines but without the guest operating system. They’re isolated, but they share Host OS. That makes them smaller and more lightweight.

Here we will use Docker to pull and run the SQL Server 2017 container image. Then connect with sqlcmd to create database and run queries. This image consists of SQL Server running on Linux based on Ubuntu 16.04. It can be used with the Docker Engine 1.8+ on Linux or on Docker for Mac/Windows.


Prerequisites: 

  • Docker Engine 1.8+ on any supported Linux distribution or Docker for Mac/Windows. 
  • Minimum of 2 GB of disk space
  • Minimum of 2 GB of RAM


Steps of Installation:


Pull the SQL Server 2017 Linux container image from Docker Hub.

sudo docker pull microsoft/mssql-server-linux:2017-latest


apt install docker.io


   sudo docker pull microsoft/mssql-server-linux:2017-latest


    To run the container image with Docker

    sudo docker run -e 'ACCEPT_EULA=Y' -e 'SA_PASSWORD=<YourStrong!Passw0rd>' \
   -p 1433:1433 --name sql1 \
   -d microsoft/mssql-server-linux:2017-latest


To view your Docker container. If the STATUS column shows a status of Up, then SQL Server is running in the container

sudo docker ps -a


      Change the SA password: 


sudo docker exec -it sql1 /opt/mssql-tools/bin/sqlcmd \

   -S localhost -U SA -P '<YourStrong!Passw0rd>' \

   -Q 'ALTER LOGIN SA WITH PASSWORD="<YourNewStrong!Passw0rd>"'


command to start an interactive bash shell inside your running container

sudo docker exec -it sql1 "bash" 


Once inside the container, connect locally with sqlcmd. Sqlcmd is not in the path by default, so you have to specify the full path.

/opt/mssql-tools/bin/sqlcmd -S localhost -U SA -P '<YourNewStrong!Passw0rd>'


To end your sqlcmd session, type QUIT .Your container continues to run after you exit the interactive bash shell.


Connect from outside the container


We can also connect to the SQL Server instance on Docker machine from any external Linux, Windows, or macOS tool that supports SQL connections.


sqlcmd -S 10.3.2.4,1433 -U SA -P '<YourNewStrong!Passw0rd>'


  SQL Server container can be  start,stop and remove  with the command 

sudo docker start sql1
sudo docker stop sql1

sudo docker rm sql1


Sunday, July 22, 2018

Installation of SQL Server in Ubuntu 18.04 Linux Platform


Please install Oracle virtual Machine in your laptop . Please follow the below link to install Ubuntu 18.04 in your virtual machine. 


Please follow the below steps to install SQL Server in Ubuntu 18.04


Step 1:

wget -qO- https://packages.microsoft.com/keys/microsoft.asc | sudo apt-key add –


Step 2:


Step 3:
sudo apt-get update
sudo apt-get install -y mssql-server


Once you run this command you will get an error for downgrading openssl. You must downgrade openssl prior to 1.1.0 and then only you can install sql server in Ubuntu 18.04. Please check the below screen shot.


The steps after the openssl error

Step 4:

apt-get install -y libjemalloc1 libsss-nss-idmap0 libc++1 gawk curl


Step 5 :

curl https://packages.microsoft.com/keys/microsoft.asc | apt-key add -


Step 6 :

add-apt-repository "$(curl https://packages.microsoft.com/config/ubuntu/16.04/mssql-server-2017.list)"


Step 7:


Step 8:


Step 9 :

dpkg -i ca-certificates_20160104ubuntu1_all.deb


Step 10:

wget http://archive.ubuntu.com/ubuntu/pool/main/o/openssl/openssl_1.0.2g-1ubuntu4_amd64.deb


Step 11

dpkg -i openssl_1.0.2g-1ubuntu4_amd64.deb


Step 12:

apt install -y libcurl3


Step 13:

apt-get update
apt-get install -y mssql-server


Step 14:

After the package installation finishes, run mssql-conf setup and follow the prompts to set the SA password and choose your edition.

sudo /opt/mssql/bin/mssql-conf setup


Step 15 : To chek SQL Server service is started or not

Systemctl status mssql-server


Step 16: 

Sudo apt-get install mssql-tools


Step 17 :


Bash path settings for SQLCMD tool

echo 'export PATH="$PATH:/opt/mssql-tools/bin"' >> ~/.bash_profile

echo 'export PATH="$PATH:/opt/mssql-tools/bin"' >> ~/.bashrc
source ~/.bashrc


Step 18 :

Login to SQL Server using SQLCMD

Command : 

sqlcmd -S localhost -U SA -P


  Step 19: 

Active firewall and open port 1433 for communicating with application

command : sudo ufw enable 


Step 20: 

Sudo ufw allow 1433